📌

Couldn't load image

3D Modelling

Published on: Monday, 01.29.2024
Languages: Java
Version: 1.0


This application allows you to create, view and interact with three-dimensional objects or structures all in one, window. The GUI was made (again) using JFrames.

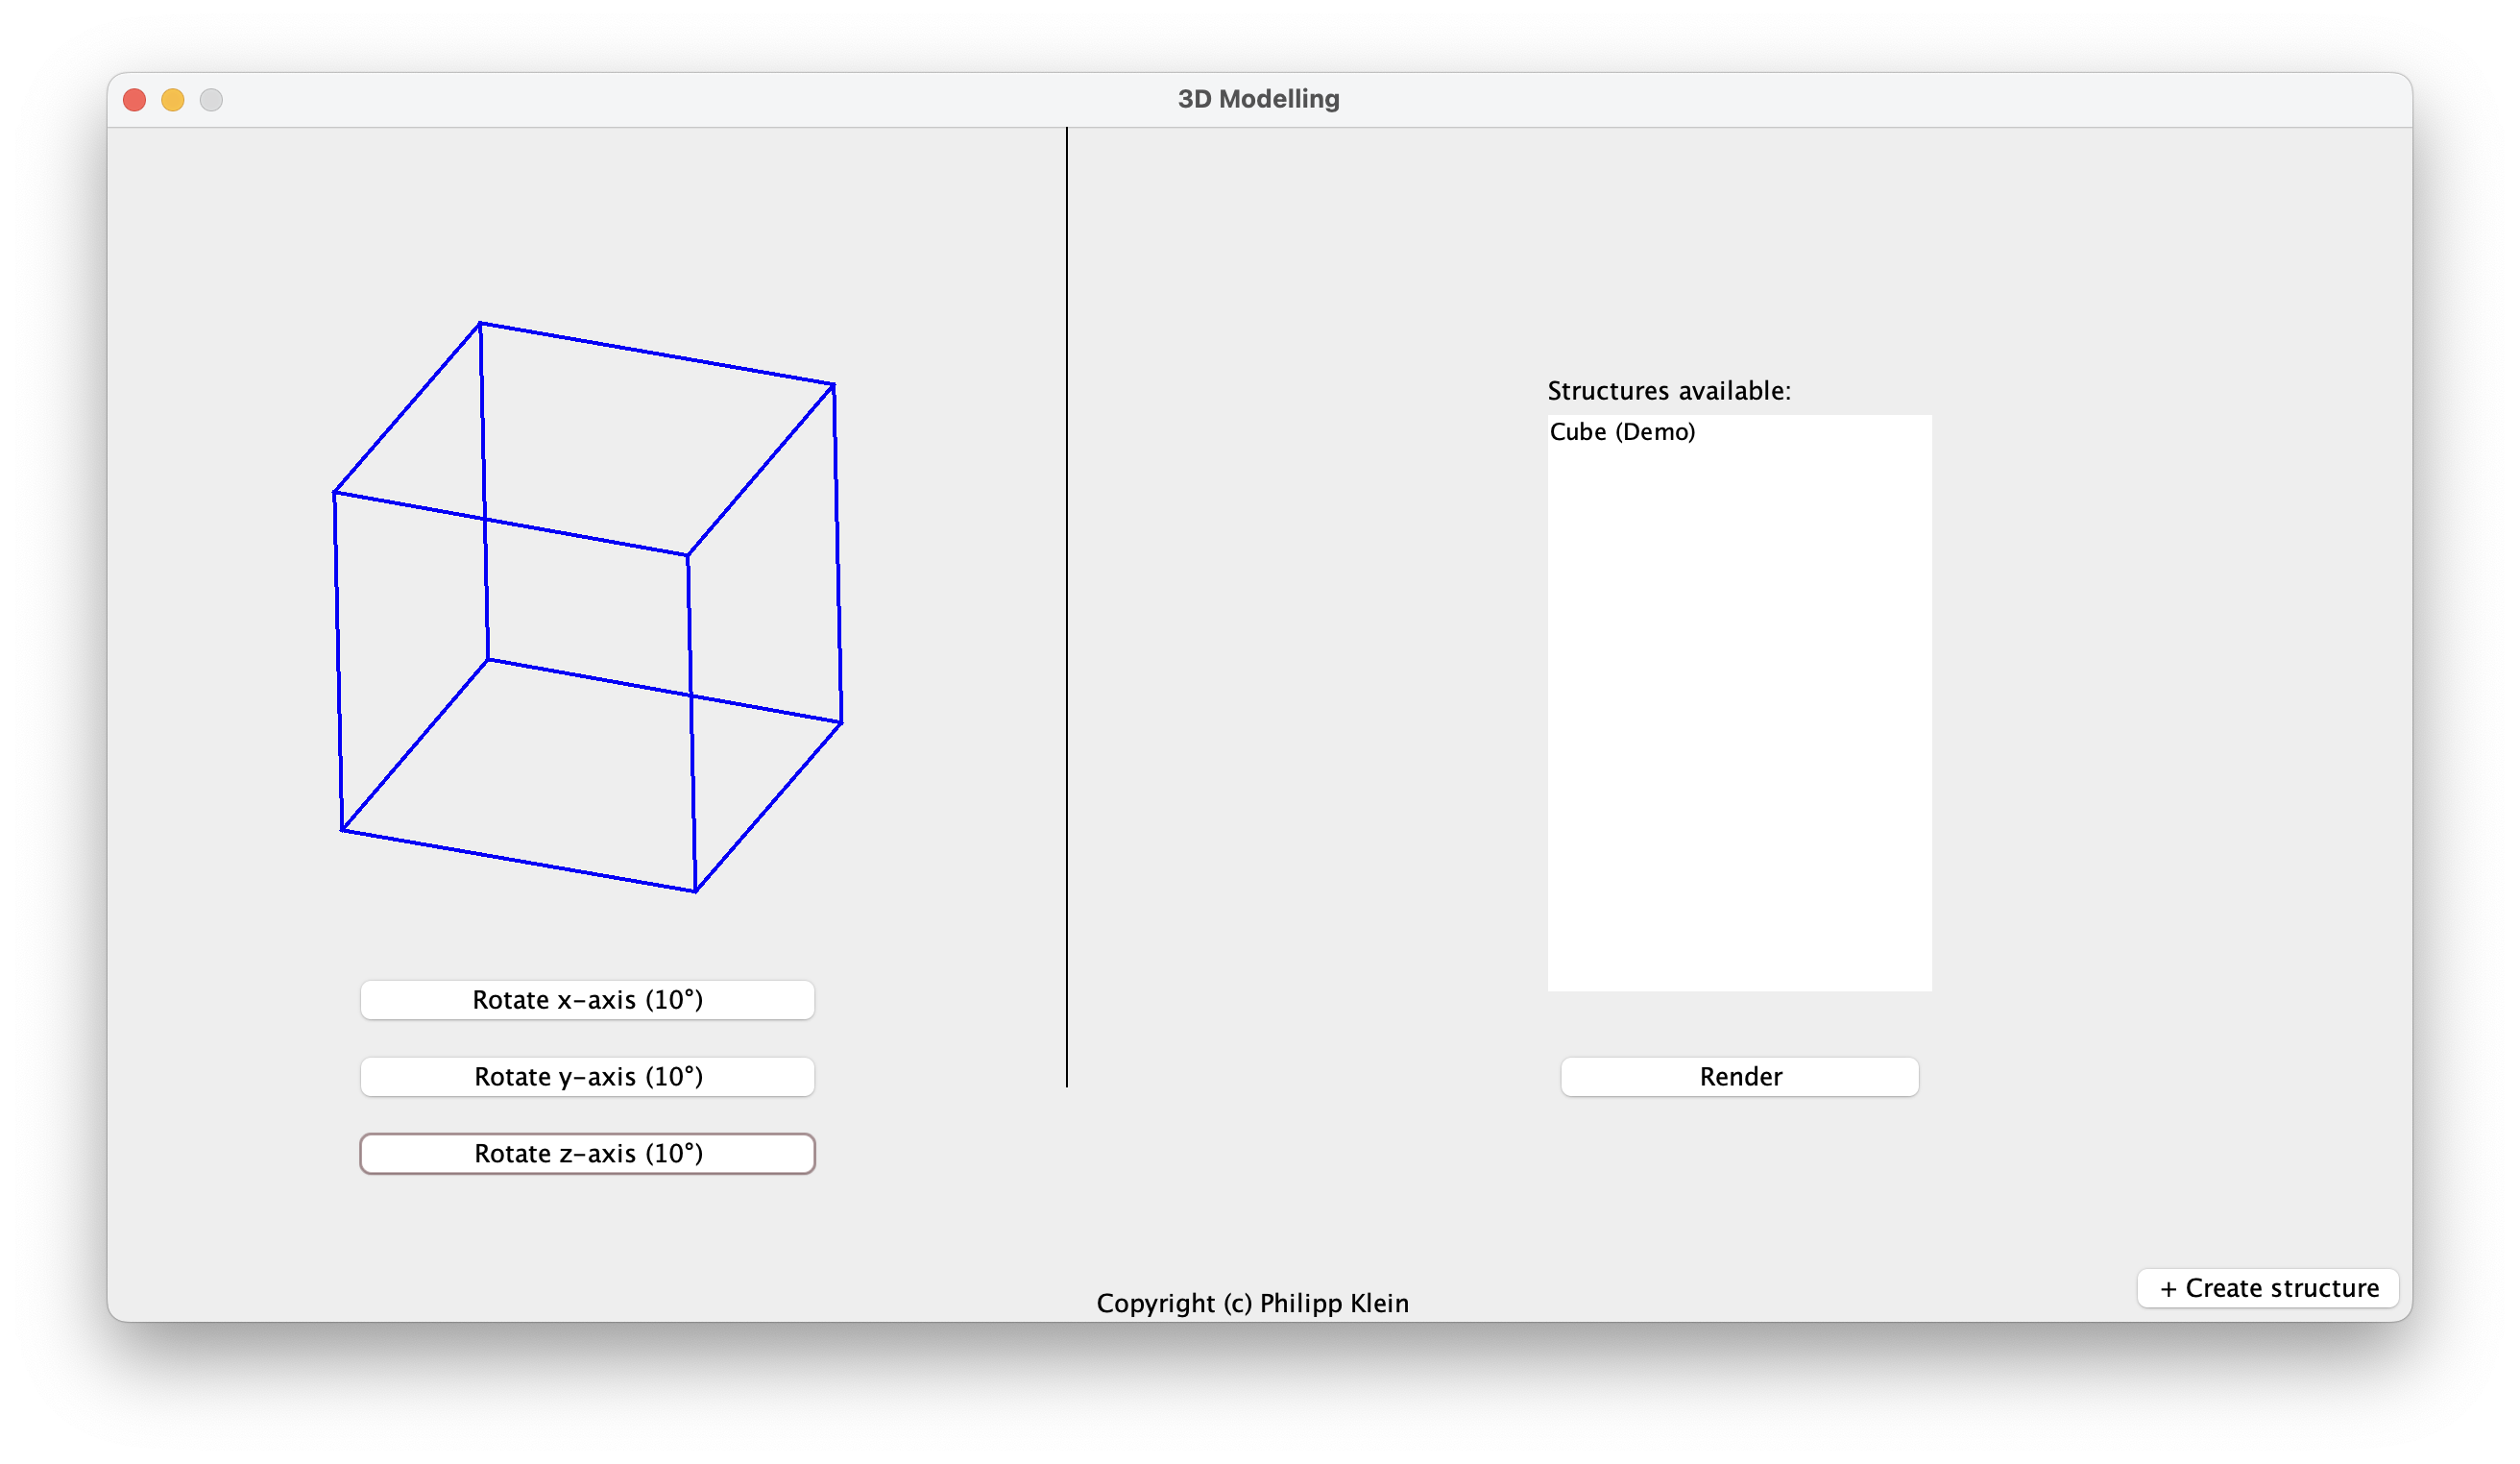
When you launch the software, you’ll be on the main screen, where you can render and rotate your created structures. There is also a cube structure as a demo.

Rendering Window

On the left side of the screen, you’ll find the rendering area for the structure. You can rotate it using the buttons at the bottom. To create a new structure, click the ‘+ Create structure’ button in the bottom right corner. To select a structure for rendering, select one in the list and press the ’Render’ button.

Structure-Creator Window

After pressing the ’+ Create structure’ button on the main screen, you’ll find yourself on the Creator screen. On this screen, you have the following options:

  1. Naming Your Structure: Upon entering the creator screen, you’ll see a text field labeled ’Name of the new structure’. Here, you can give your structure a unique name.

  2. Adding Nodes: In this software, I refer to vectors or points as ’Nodes’. To add a Node, locate the field inside the graphical representation of the vector/point. Here, you can type in the coordinates of the Node you wish to add. There will be placeholders for the coordinates to help you.

  3. Creating Relations: To create a structure, you’ll have to add relations between Nodes. Remember, a relation can only be made between two Nodes, otherwise an error will be given out. Once you’ve selected two Nodes, you can create a relation between them.

  4. Deleting Nodes and Relations: If you need to remove a Node or a relation, you can do so by selecting them from their respective lists. Once selected, press the ’Delete’ button located at the bottom of each list.

  5. Test Rendering and Rotation: The software allows you to test render your structure. This means you can view your structure as it would appear when rendered. Additionally, you can rotate your structure around the x, y, and z-axis by 10 degrees, similar to the main screen.

Files:


Couldn't load image

Image Generator

Published on: Sunday, 04.20.2025
Languages: Java
Version: 1.0


1. General Information

This application was coded as a Minecraft plugin for version 1.8. It enables the players to render images from the web in the game. The plugin can only render images horizontally and is designed for the super flat world (grass).

My server has 2 GB of RAM and was able to render most of the provided images, including large ones. However, please be cautious and increase the image size gradually to see how well your server handles rendering larger images.

2. How to use the plugin

There are two essential commands inside the plugin:

  1. /generateimage [URL]
    → Takes the image from the given URL and draws the image in game.

  2. /clearimage
    → Clears the drawn image.

Let's test the image-generation command. We take this cute image of my little budgie:

My little budgie <3
315px x 420px

You can replicate it, too, to test the image generation.

When you press enter, the plugin will download the image first and tell you the width and height in pixels. When the download is successful, the image is drawn. In every world, the beginning of the drawing (top left) has the coordinates x=0, y=4, z=0. The resulting image should look like this:


Even cuter in game :D

The program goes through each pixel and determines with the weighted Euclidean distance the best possible block, that represents the same color as the pixel.

Source: Baeldung

Files


Couldn't load image

Petri Network

Published on: Monday, 03.31.2025
Languages: Java
Version: 1.0


1. General Information

This application allows you to create, view, and interact with Petri-Networks. The GUI was implemented using Java Swing.

When you launch the software in your IDE or via the JAR file, you'll find yourself in the main window. Here you can interact with the Petri-Network and fire the Transitions.

2. How to use the application

In the bottom right corner, you’ll find an ‘Edit’ button that allows you to toggle between the standard (‘Run’) mode and the ‘Edit’ mode. Once you press the button, you have the following options:

  • Delete: you can effortlessly remove Nodes/Places, Transitions, and Edges by enabling delete mode and simply clicking on their weight button.

  • Add Node/Place and Transition: if those modes are active, just click with your mouse anywhere on the screen to create a Node/Place or Transition at this location.

  • Add Edge: to connect a Transition and a Node/Place, first press the weight button of either the Transition or the Node/Place to set the direction of the edge, then press the weight button of the other element. For visibility and usability reasons, Transitions and Nodes/Places can only have a one-way edge.

Files:


Couldn't load image

CMS Experts

Published on: Friday, 01.17.2025
Languages: HTML, CSS, JavaScript, PHP
Version: 1.0


CMS Experts is a fictional company, that was founded on the subject of a 'computer science project.'. In this subject, we had to choose a CMS of our choice and integrate ChatGPT into it for content generation.

We chose WordPress and developed a plugin:

1. Site-generation

The main feature of this plugin was the automatic site generation. In the Text field, you can enter the topic you want to generate a new site about. You can type it in or use your voice to dictate.

Next you can choose, what type of post you want to generate. You choose between:

  • Product Page
    → A product page with different topics, separated by headings. A table of technical specifications is available if ChatGPT has explicit knowledge about it.

  • Event
    → An event page with a quick info summary at the top and a rich information text below.

  • Normal post
    → A normal post seperated by headings.

Affecting the site generation and writing tools: Explicit content won't be generated. An error will be displayed.

2. Writing Tools

As the name suggests, the writing tools assist you in optimizing your text, before posting it on your WordPress site.

You have the following operations: summarize, proofread, bullet points (max. 5), friendly and professional.

3. Settings

Inside settings, you can save your API key to give the plugin access to use ChatGPT for its services.

👆🏻

Before the key will be saved, a quick connection test is performed, and the result will be returned to the user (see above).


Couldn't load image

OrcaSoft

Published on: Wednesday, 07.10.2024
Languages: Java, CSS, HTML
Version: 1.0


This application was coded during the fourth semester in the subject of Software Engineering II. My professor gave my team the task of building a job marketplace like StepStone, Indeed, etc.

The application is built on the Java framework, Vaadin. Our professor gave us a pre-build application that was made for managing and viewing cars. And that is what we came up with:

1. Login and Registration

👆🏻

Other teams used the UI and logic of the software and built on top of it. We've chosen to wipe it completely (except the connection class for the database) and build our own UI and logic.

2. Search for Jobs

👆🏻

As you can see, while you type, you get suggestions that you can select with the cursor. When ENTER is pressed, you'll see the results if available.

3. Profile and Job offer settings

👆🏻

When you're logged in as a company, you'll see the regular data as well as your current vacancies on the left side. As a student, you'll see your regular data as well with your applications on the left side.

4. Job applications

👆🏻

A student, who wants to apply for a job offer, needs to first have the necessary skills to, send an application. You'll see this either via the notice at the top of the screen or by the fact that the apply button is deactivated on the search view.


Couldn't load image

TicTacToe

Published on: Thursday, 08.24.2023
Languages: Java
Version: 1.0


This program allows you to play TicTacToe against a computer on a 3x3 board. The user interface is made using JFrames.

Main screen of the game

On the top right, you can select the level of difficulty. It ranges between: Easy, Normal and Hard. If you have selected a difficulty, you can start the game just by selecting a field and making your first move.

You cannot change the difficulty during a game or restart it. You have to finish the game first.

Finished game (tie)

When the game has ended, it'll be indicated by the 'Reset' button, that appears at the bottom of the screen.


Files:


Couldn't load image

Math Function Calculator

Published on: Monday, 06.12.2023
Languages: Java
Version: 2.0.1


This program lets you calculate and draw a mathematical function. The calculator is array-based. The dashboard and drawing interface are built using JFrames.

When you first launch the JAR-File you’ll find yourself on the dashboard:

Dashboard

In the text field, currently with the text „Type…“ you can type in your function. Not every function is supported e.g. sin, cos are not supported. The function calculator is very limited! In the text field, with the „x = “ on the left, you input the value for x. If you mistakenly entered a character, left the field blank or entered a number with a character, you’ll receive an error message as well.

Dashboard with an error displayed

When the function you've put in is accepted, and you press the 'Draw' button, a drawing window will open, displaying the function.

Function drawer window

Note: the window has a size of 500x500 pixels, resulting in 50x50 blocks.


Files:


Couldn't load image

Alphametic riddle solver

Published on: Monday, 06.12.2023
Languages: Java
Version: 1.0


This is the first program, that I've written even before university. It solves an alphametic math riddle, consisting of three variables: v1, v2 and the solution. It does not support more variables! (see constructor).

Here's an example of an alphametic riddle:


  SEND
+ MORE
-------
  MONEY

To solve those puzzles correctly, we have to follow a certain set of rules:

  1. Every letter type can only be assigned to one specific digit, and vice versa

  2. The digits need to range between 0 and 9

  3. The first letter of each word in the equation cannot be zero

For our given puzzle, the correct solution would be:


  9567
+ 1085
--------
  10652

To solve these puzzles, the program uses two Strings:


private String characters = "";
private String numbers = "";

The String characters holds all the letters from this puzzle. For our example, it would be: characters = "SENDMORY". The String numbers distribute the digits to the letters numbers = "10234567". The numbers are distributed according to the rules above.

Now the software forms the numbers according to the two String variables. If the solution is correct, it'll be passed to the console. If not, a normal number will be made out of the numbers-String and raised by one until, there are no duplicate digits in the String or any first letter has now zero assigned. This happens, until all digits of this number have a value of 9.


Files: